I've been browsing this forum for the past 4 months or so soaking up all the great info I could find. I have to say that you guys (and girls?) seem to know your stuff pretty well; or at least it seems so coming from someone who doesn't know much about it.
I have recently left my full time job to invest 100% of my time and focus on starting a WSR business. I bought a Delta Kits EZ500D system and dove in. The past few weeks I have spent getting the business set up and practicing on my practice shields. Korey and the Delta Kits team have been a big help in answering questions from insurance billing to injector cleaning procedures. As of right now, my applications to the networks are in and I am waiting on their responses. Hopefully I will have those by the end of the week and I can start billing some work!
On to the questions...
I've only done about 75 repairs so far. There are two issues that consistently arise during my repairs.
Issue 1: A single air bubble appears in the pit resin after curing. The air is not visible prior to curing the resin. If cured without a tab the bubble does not appear. If cured using curing tape the bubble does not appear but sometimes the pit is concave. Out of the 75 repairs, probably 50 were cured with a curing tab and every single one of those has and air bubble in it. I keep my pit resin upside down to minimize air in the resin. I must be doing something wrong since it doesn't seem this is a common problem. Here's a video showing this issue: http://www.youtube.com/watch?v=JkoBExgm ... e=youtu.be
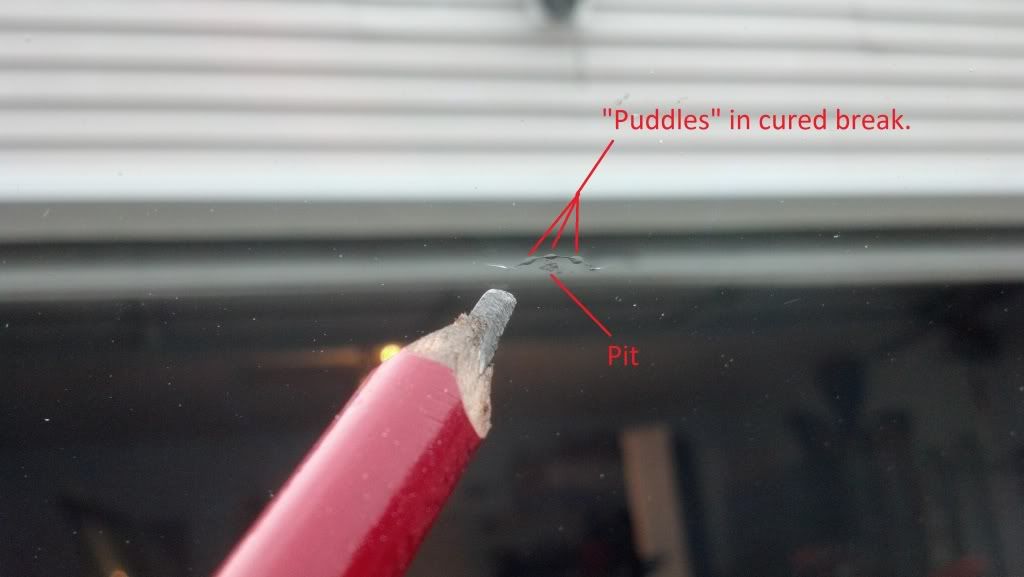
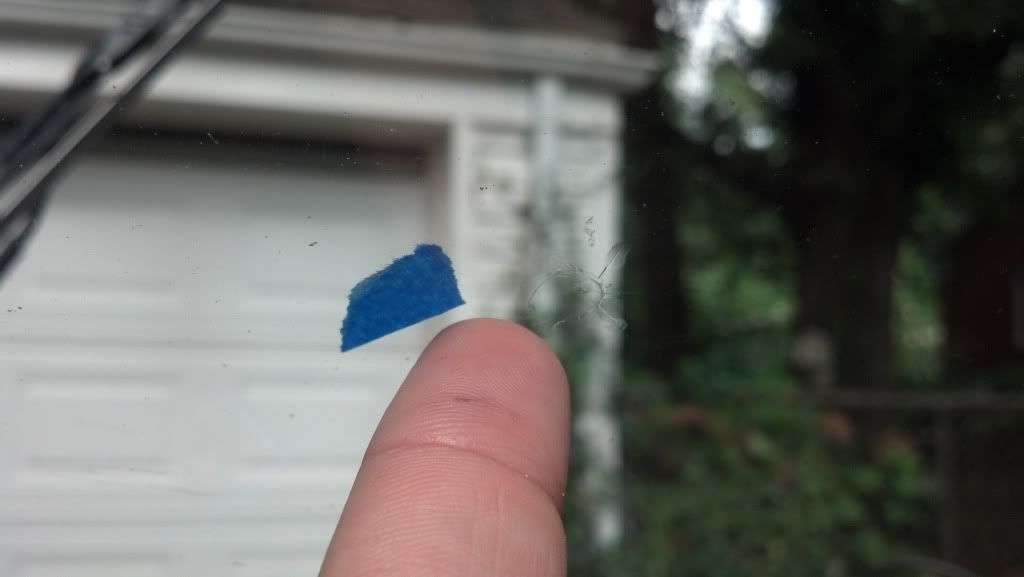
Issue 2: Flowering / puddles in a break that has previously had water in it. This happens in probably 9/10 breaks that I have dried out and then repaired. This issue seems to have a few possible causes - too much pressure causing the resin to flow between the PVB and glass, the WS has started to delaminate due to age, overheating the WS causing the glass and PVB to separate. I guess I could be using too much pressure but it's nothing more than I used on a normal break that I didn't introduce water to. The WS I am practicing on is 2 years old and all the breaks are made by me and are therefore new; the age of the WS or breaks are not the issue. When using heat, I have been using the moisture evaporator for the recommended 15-20sec so I don't believe that overheating is an issue. I have also tried drying out the breaks using compressed air and rubbing alcohol; this still gave the flowering effect even though no heat was used. I've attached some pictures below so that y'all can see where I'm coming from.
Thanks in advance for the help!