Newbie intro / Air Bubble and Flowering issues

Post your windshield repair tips, questions, advice! Note there is a sub-forum specifically for business development questions.
ssbogger
Junior Member
Posts: 24
Joined: April 18th, 2012, 9:39 am
Enter the middle number please (3): 3
Location: SC
Contact:

Newbie intro / Air Bubble and Flowering issues

Post by ssbogger »

Hey people!

I've been browsing this forum for the past 4 months or so soaking up all the great info I could find. I have to say that you guys (and girls?) seem to know your stuff pretty well; or at least it seems so coming from someone who doesn't know much about it.
I have recently left my full time job to invest 100% of my time and focus on starting a WSR business. I bought a Delta Kits EZ500D system and dove in. The past few weeks I have spent getting the business set up and practicing on my practice shields. Korey and the Delta Kits team have been a big help in answering questions from insurance billing to injector cleaning procedures. As of right now, my applications to the networks are in and I am waiting on their responses. Hopefully I will have those by the end of the week and I can start billing some work!

On to the questions...
I've only done about 75 repairs so far. There are two issues that consistently arise during my repairs.
Issue 1: A single air bubble appears in the pit resin after curing. The air is not visible prior to curing the resin. If cured without a tab the bubble does not appear. If cured using curing tape the bubble does not appear but sometimes the pit is concave. Out of the 75 repairs, probably 50 were cured with a curing tab and every single one of those has and air bubble in it. I keep my pit resin upside down to minimize air in the resin. I must be doing something wrong since it doesn't seem this is a common problem. Here's a video showing this issue: http://www.youtube.com/watch?v=JkoBExgm ... e=youtu.be

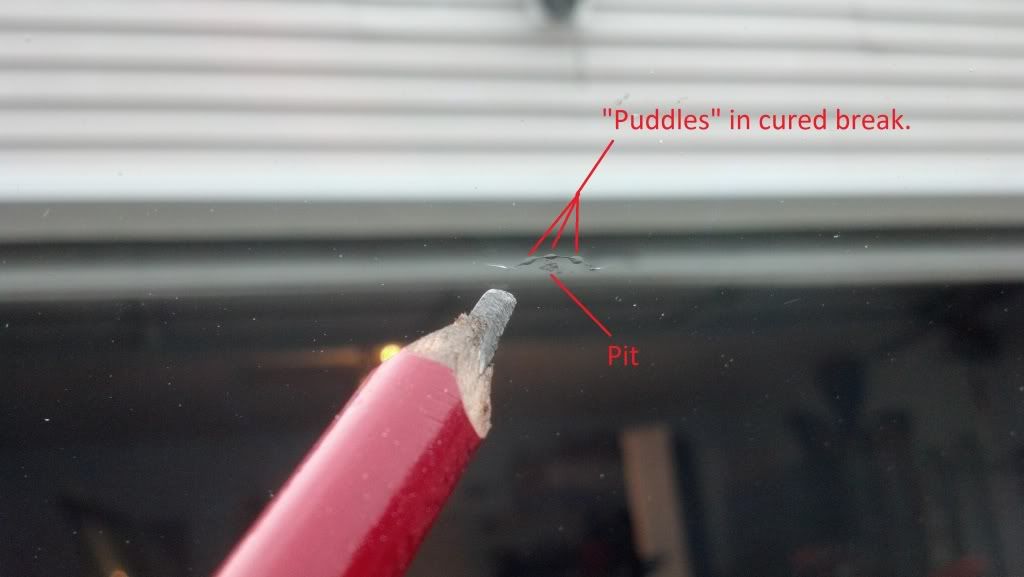
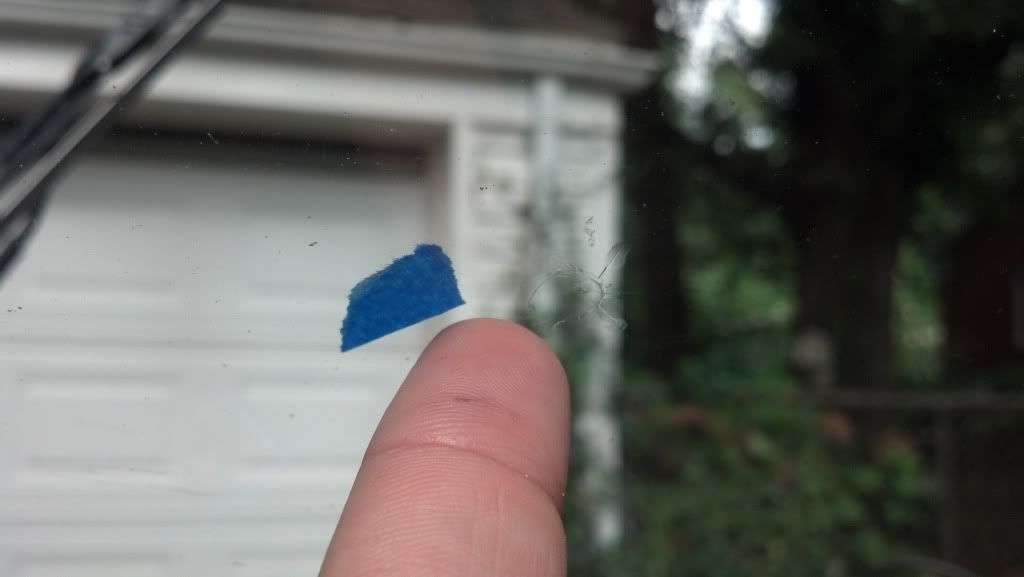
Issue 2: Flowering / puddles in a break that has previously had water in it. This happens in probably 9/10 breaks that I have dried out and then repaired. This issue seems to have a few possible causes - too much pressure causing the resin to flow between the PVB and glass, the WS has started to delaminate due to age, overheating the WS causing the glass and PVB to separate. I guess I could be using too much pressure but it's nothing more than I used on a normal break that I didn't introduce water to. The WS I am practicing on is 2 years old and all the breaks are made by me and are therefore new; the age of the WS or breaks are not the issue. When using heat, I have been using the moisture evaporator for the recommended 15-20sec so I don't believe that overheating is an issue. I have also tried drying out the breaks using compressed air and rubbing alcohol; this still gave the flowering effect even though no heat was used. I've attached some pictures below so that y'all can see where I'm coming from.
Thanks in advance for the help!
Image

Image
chipfix
Junior Member
Posts: 60
Joined: April 26th, 2009, 2:19 am
Contact:

Re: Newbie intro / Air Bubble and Flowering issues

Post by chipfix »

My theory on the air bubble appearing is that when the resin cures is shrinks slightly.
If you use a thick tab it will stick to the tab and pull up from the bottom when it shrinks leaving a trapped air bubble.
It sounds like you found the solution, don't use a curing tab.
If you use curing film don't push it down flat,leave it so the resin is above the level of the glass and you shouldn't have a problem with it being concave.

As for your flowering issues,the most common reason is that the glass is to hot and/or to much resin pressure.
Cooling the glass if it is beyond warm and using minimum pressure should fix it.Also using a thicker viscosity resin in hot weather will help.

PS: Good job with the pics and video.
screenman
Senior Member
Posts: 3192
Joined: February 25th, 2004, 1:44 pm
Enter the middle number please (3): 5
Location: uk Lincolnshire
Contact:

Re: Newbie intro / Air Bubble and Flowering issues

Post by screenman »

Way to much pressure, the first repair is also not filled properly as in we can still see the end of the legs. Hot glass can certainly help towards flowering/ delamination but it is the pressure that does the damage. We can repair very hot glass but only by being very careful with the amount of pressure we use. Slow down take your time, let the resin flow, chill.

Pit fill problems, the one that leaps out at me is the fact your are laying your pit fill on top of Magnibond, in as much as you are removing all the pitfill as soon as you start scraping. I have found better success by making sure there is still a pit to fill with pit fill. I do this by very gently dabbing the pit with a paper towel, just a quick dab as we do not want to take resin out of the repair. In our classes I have found most people who have air bubbles in the pit fill have done what you have done.

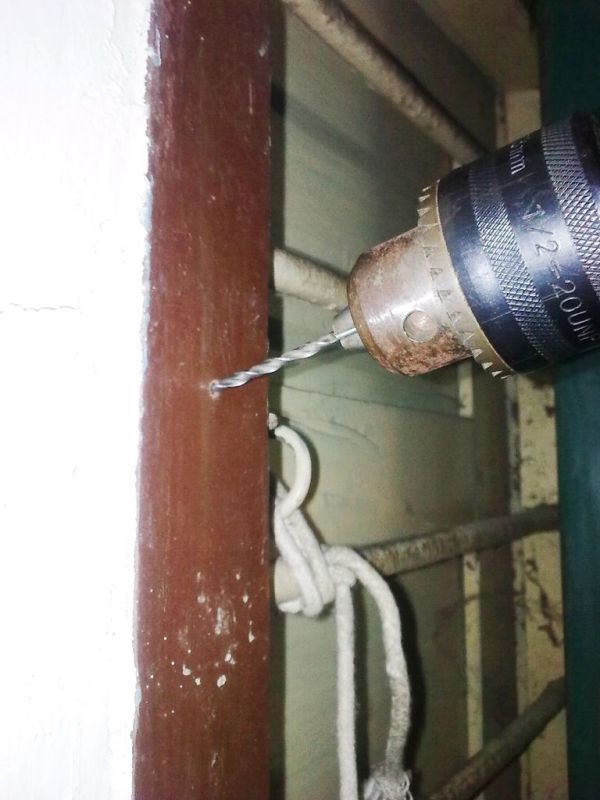
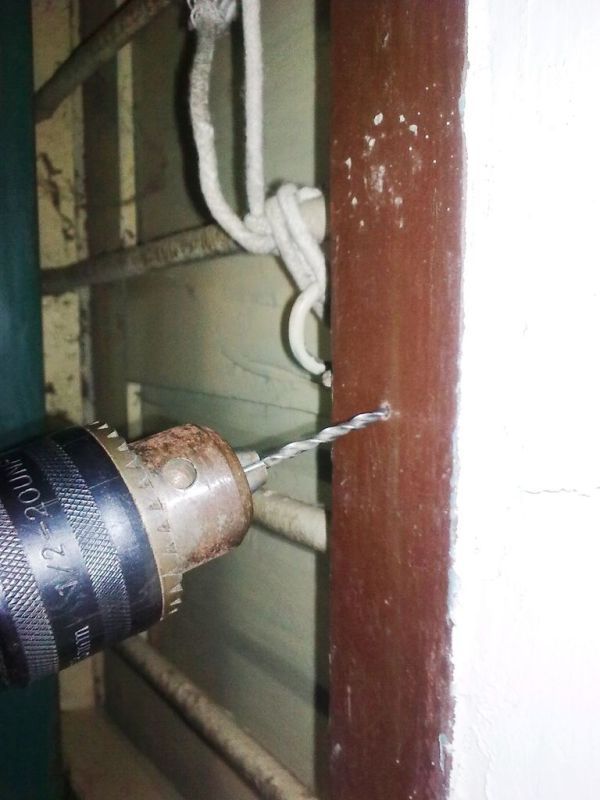
Also when drilling make sure you drill very slightly upwards if that makes sense, most people do the opposite which means there is always a very small air bubble when the pit fill is applied.
User avatar
pommy
Member
Posts: 258
Joined: August 24th, 2011, 11:20 pm
Enter the middle number please (3): 3
Contact:

Re: Newbie intro / Air Bubble and Flowering issues

Post by pommy »

Hi Screen,

I've been suffering with the "bubble" recently and I follow the same "dab" method with you. I've even tried using the dust blower - just to see how that went.

Today I made a great repair, almost invisible - but when the lamp was curing - BING! the bubble appeared halfway through the curing process?! Arrgh!

It definitely wasn't there before. In this case I chose to leave it, but in the past I've drilled a bit out and re-filled it.

I think the bubble is caused by air left in the break being pushed out in the curing process personally - which would mean there is no solution apart from maybe more vacuum cycles - what do you think?
Also when drilling make sure you drill very slightly upwards if that makes sense, most people do the opposite which means there is always a very small air bubble when the pit fill is applied.
I know this is a drill and I know it's wood ;) - but do you mean like this?

Image

Or

Image

Cheers,

Pommy
If the job doesn't mean more than the pay, it will never pay more.
screenman
Senior Member
Posts: 3192
Joined: February 25th, 2004, 1:44 pm
Enter the middle number please (3): 5
Location: uk Lincolnshire
Contact:

Re: Newbie intro / Air Bubble and Flowering issues

Post by screenman »

Top picture I feel is correct, I also go with your idea of air left in the break. When the bridge is on the glass the glass is distorted slightly, removing the bridge allows the glass to move and could take in a bit of air, or make an air pocket larger.

Look carefully as you tighten the injector body onto the glass to create a seal, sometimes you will see movement in the damage this reverses as you remove the pressure. Remember just enough pressure to create a seal and no more.
ssbogger
Junior Member
Posts: 24
Joined: April 18th, 2012, 9:39 am
Enter the middle number please (3): 3
Location: SC
Contact:

Re: Newbie intro / Air Bubble and Flowering issues

Post by ssbogger »

chipfix wrote: If you use curing film don't push it down flat,leave it so the resin is above the level of the glass and you shouldn't have a problem with it being concave.

As for your flowering issues,the most common reason is that the glass is to hot and/or to much resin pressure.
Cooling the glass if it is beyond warm and using minimum pressure should fix it.Also using a thicker viscosity resin in hot weather will help.

PS: Good job with the pics and video.
I try to no put any pressure down when applying the curing tape but I know I could use some more work in that area. Thanks for the tips.
14u2ponder wrote:Yes, as far as the flowering you need to get more training or start from scratch because you are going WAY overboard on pressure. You should never ever let a repair get to that point in picture two. Are you watching the repair?

My advice would be to get with brent and let him go through a training session with you, because that picture 2 is a serious problem that needs to be corrected.
I do know that I need more training and am currently planning a trip to make it to a training session with Delta Kits. It is good to know that is NOT how a repair should look. To be fair, the repair in picture two was heated twice at 15 sec each time approx 5 min apart. :o I'm new to this OK?
screenman wrote:Way to much pressure, the first repair is also not filled properly as in we can still see the end of the legs. Hot glass can certainly help towards flowering/ delamination but it is the pressure that does the damage. We can repair very hot glass but only by being very careful with the amount of pressure we use. Slow down take your time, let the resin flow, chill.

Pit fill problems, the one that leaps out at me is the fact your are laying your pit fill on top of Magnibond, in as much as you are removing all the pitfill as soon as you start scraping. I have found better success by making sure there is still a pit to fill with pit fill. I do this by very gently dabbing the pit with a paper towel, just a quick dab as we do not want to take resin out of the repair. In our classes I have found most people who have air bubbles in the pit fill have done what you have done.

Also when drilling make sure you drill very slightly upwards if that makes sense, most people do the opposite which means there is always a very small air bubble when the pit fill is applied.
screenman wrote:Top picture I feel is correct, I also go with your idea of air left in the break. When the bridge is on the glass the glass is distorted slightly, removing the bridge allows the glass to move and could take in a bit of air, or make an air pocket larger.

Look carefully as you tighten the injector body onto the glass to create a seal, sometimes you will see movement in the damage this reverses as you remove the pressure. Remember just enough pressure to create a seal and no more.
Screenman - It makes sense that the pressure is what does the real damage; the heat just makes it easier to do the damage. From reading previous posts on curing tabs, I did come across your tip about dabbing the pit with a paper towel and did try this as well. It didn't really help with the air bubble but maybe I'll keep trying it. I do try and drill at this angle; the idea is that the air has a place to naturally escape being that it rises in a liquid correct? Thanks for the tip on the injector body pressure. I probably need to work on not over tightening.
pommy wrote: I think the bubble is caused by air left in the break being pushed out in the curing process personally - which would mean there is no solution apart from maybe more vacuum cycles - what do you think?

Cheers,

Pommy
Pommy - good line of thought here. I really hadn't thought of that one but it could be the case i guess. Good to know that someone else has to deal with this frustration from time to time!


Alright guys, I'm headed back out to the garage to practice. If you have any more theories/ideas/tips please post them!

Goals for the day - Eliminate flowering by not overheating (<20sec) and using little if any thumb pressure on the injector during the pressure cycle.
-Eliminate air bubbles by focusing on not over tightening the injector body, being 100% sure all air is removed from break, and implementing the "dab" method.
glassdoctor
Senior Member
Posts: 733
Joined: November 13th, 2003, 9:24 am
Contact:

Re: Newbie intro / Air Bubble and Flowering issues

Post by glassdoctor »

I think it's related to the pit tab. The stiffness of the tab and how it's used seems to be the key, like how much resin is left under the tab before curing. Stiff pit tab material can't flex to fill in the dimple when the resin effectively shrinks. Whether or not it actually shrinks I don't know, but that's the apparent effect when it sucks in to form a dimple. Anyway, considering that a pit tab resists forming the dimple, it seems logical that an air gap could form in a vacuum under the tab. I think we should technically call it a vacuum bubble because I don't think there is any air in it. 8-) That's how I've always thought of it. :ugeek:

If you don't use a cure tab of any kind, these bubbles do not happen. I have to stop so I don't plug anything not DK :o lol
screenman
Senior Member
Posts: 3192
Joined: February 25th, 2004, 1:44 pm
Enter the middle number please (3): 5
Location: uk Lincolnshire
Contact:

Re: Newbie intro / Air Bubble and Flowering issues

Post by screenman »

Err! why are you using heat?
bill lambeth
Senior Member
Posts: 565
Joined: September 17th, 2007, 4:29 pm
Contact:

Re: Newbie intro / Air Bubble and Flowering issues

Post by bill lambeth »

I never use heat unless I cannot get the star to feel! Heating to me waste a lot of time because then you have to make sure it cools down.I am assuming that the newbies knows what happens to legs when you heat them(shut or close or whatever).
bill lambeth
Senior Member
Posts: 565
Joined: September 17th, 2007, 4:29 pm
Contact:

Re: Newbie intro / Air Bubble and Flowering issues

Post by bill lambeth »

my bad on the spelling of Feel should be fill!
Post Reply

Who is online

Users browsing this forum: No registered users and 10 guests