Page 1 of 2
Air Bubble Trouble...
Posted: August 23rd, 2012, 7:35 pm
by pommy
I thought I'd make a fresh post so not to distract the other post about the "bubbles" away from the great "flowering" help the OP is getting.
So today I decided to take pics of the "magic appearing bubble".
Repaired break as normal - drilling was used in this case, but minimal, and in a fashion suggested by Screenman. "Dabbed" resin out prior to applying pit filler.
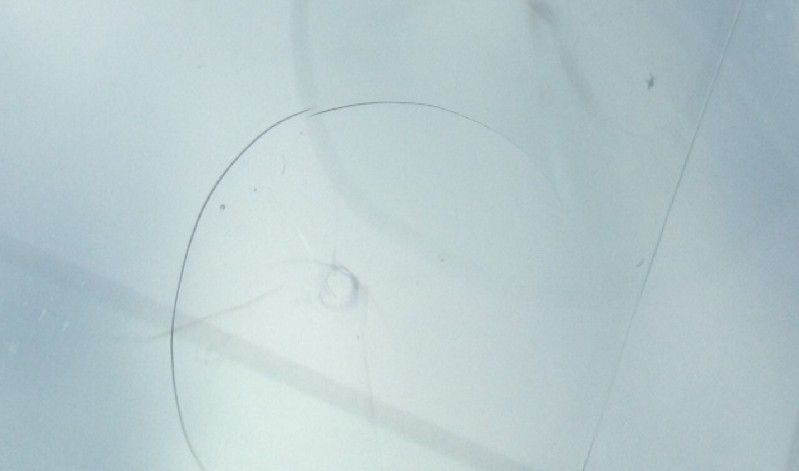
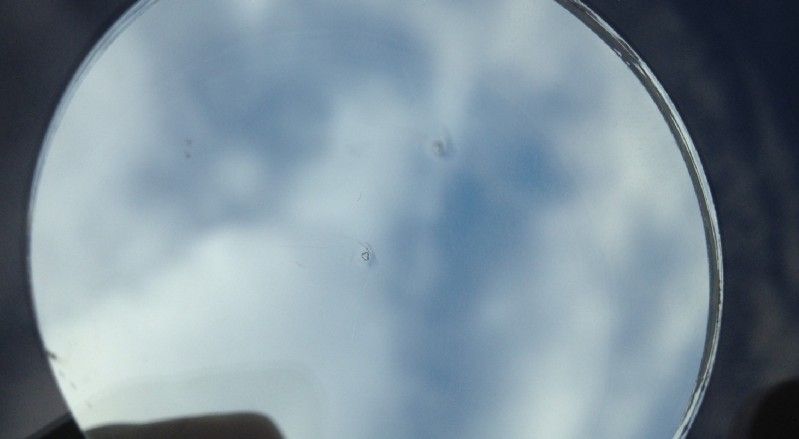
You can see better in the mirror as the camera focused there instead - there is no bubble.

Closer...
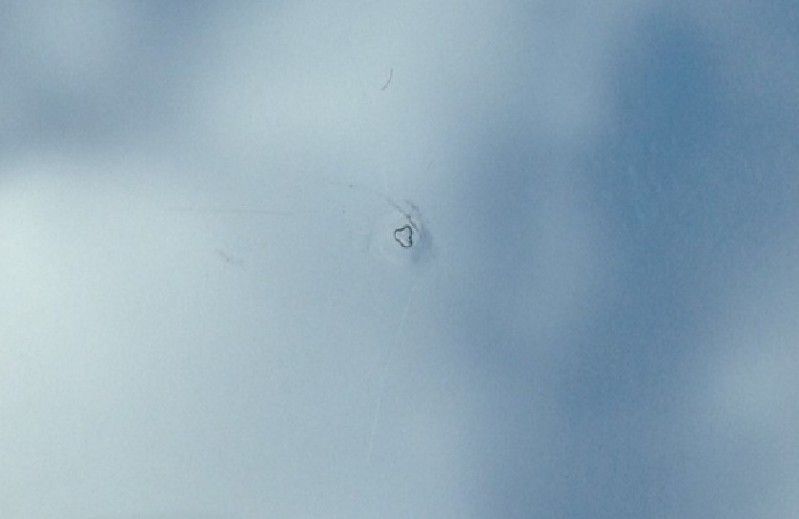
Lamp applied - 4 mins - sunny day.
Lift the lamp off after 30 seconds - BAM! It's there...
Closer...
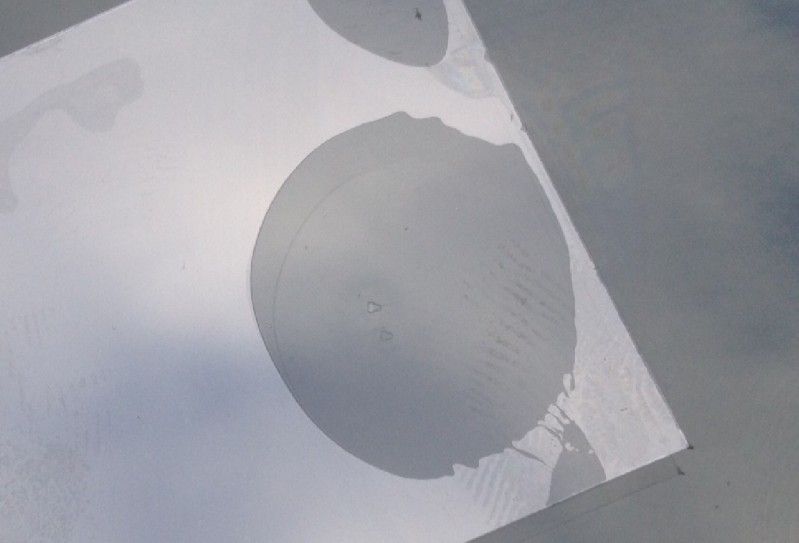
The otherwise good, but now spoiled finished repair...
Closer...
Prior to this repair, I didn't use a tab, that had a bubble too. (It was the reason I took pictures of this second repair).
So I'm stumped

Any advice would be appreciated - except DryStar's - as you seem to "separate" yourself from poor technicians like myself (your words).
Cheers,
Pommy
Re: Air Bubble Trouble...
Posted: August 23rd, 2012, 8:09 pm
by pommy
Yeh - that makes sense to me...
Previously, before "dabbing", when I put the pit filler under the repair, or in the repair - it displaces the thinner resin as it goes in.
Perhaps this is the simple answer - stop "dabbing"!
Hope so. I'll give it a whirl tomorrow. Thanks for the input.
I must add, that the holes that I'm talking about are not deep, long drill holes - they are normally shallow, round bur holes that have just been scuffed out to clear the crushed glass or clean an older chip.
Cheers,
Pommy
Re: Air Bubble Trouble...
Posted: August 23rd, 2012, 8:43 pm
by glassdoctor
Very strange that you had a bubble form without a tab. But, the pit filler I use is not as thick as DK pit resin, so that's another variable.
Do you have any tabs that are flexible, so the tab dimples? In my experience, you are much more likely to get bubbles using a stiff tab, vs a thin flexible tab or film.
Re: Air Bubble Trouble...
Posted: August 23rd, 2012, 8:58 pm
by pommy
Yep, I can cut some from a roll

Cheers for the tips!
Pommy
Re: Air Bubble Trouble...
Posted: August 23rd, 2012, 9:29 pm
by Mr Bill
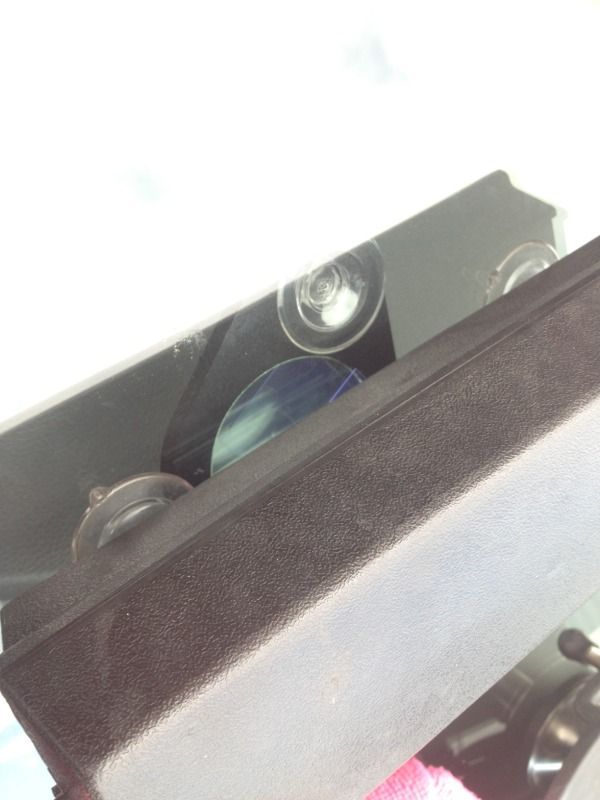
These are my cure tabs.
I pre cut them at home from a roll of cure tape.
Quite often they are re useable.
When adding pit filler to a drilled hole, insert a needle in the hole and then add a drop of pit filler.
It will flow down the needle and you can fish out any bubbles with the needle
Re: Air Bubble Trouble...
Posted: August 23rd, 2012, 9:40 pm
by pommy
Thanks for the pic Mr B
I may just cut a load like that myself - the clip is a good idea too.
Regarding the pin, I don't have a problem getting the resin into the pit, or existing bubbles out.
As you can see hopefully by the pics, there is no trapped bubble waiting to get out, or to be fished out with a pin
I'm going to try a few ideas.
Keep in mind that this bubble definitely "appears" it's 100% not there before the curing lamp goes on
Cheers,
Pommy
Re: Air Bubble Trouble...
Posted: August 23rd, 2012, 10:04 pm
by robert n
Maybe your injector barrel is pressing against the windshield and pushing the glass down more than what is needed to make a good seal. When you remove it (bridge/injector)...the windshield is slowly sucking air into the pit area when you are curing with pit resin...or creating the dimple described by others.
Try this: Before removing your bridge/injector...back off the 2 rear leveling screws and wait 1 minute to give the windshield a chance to return to its "normal" position. remove bridge/injector and apply pit resin as usual.
Re: Air Bubble Trouble...
Posted: August 23rd, 2012, 10:09 pm
by pommy
Nice idea - thanks.
The seal is barely touching the glass
I should have mentioned that, Screenman said the same too.
Cheers,
Pommy
Re: Air Bubble Trouble...
Posted: August 23rd, 2012, 10:47 pm
by Mr Bill
I wonder what would happen if you chilled your pit resin.
I notice bubbles in hot weather.
Re: Air Bubble Trouble...
Posted: August 24th, 2012, 5:58 am
by glassdoctor
Keep the resin in a vacuum prior to use, to remove any air from the resin. Every good repairman has a vacuum chamber in his tool bag... it's what separates us from the average guy lol.
